Implementing UICollectionView / UICollectionView DiffableDataSource in SwiftUI
Posted June 7, 2019 at 12:00 PM by Avery Vine
Estimated: 6 min
Just a few days ago at WWDC19, Apple announced that they had been developing an incredible new declaritive UI framework called SwiftUI, designed to substantially increase the rate at which developers can create, test, and tweak beautiful layouts for their apps. However, it became clear after the first day or two of the conference that not quite everything that was possible using UIKit had an equivalent in SwiftUI, notably UICollectionView. To find out how to interate UICollectionView with SwiftUI, I did what any WWDC attendee (or scholarship winner!) would do: asked at the labs! Today I’ll be sharing with you what I found out.
Of course, since SwiftUI is only available for devices running iOS 13+, iPadOS 13+, etc, I figured we may as well take advantage of another iOS 13 -specific API that Apple announced: UICollectionViewDiffableDataSource, designed to greatly simplify insertion, deletion, and general content management for collections.
Note: For this tutorial, I won’t be going into the details of how SwiftUI or UICollectionViewDiffableDataSource work in general (see this session and this session for help on each one, respectively).
The Code
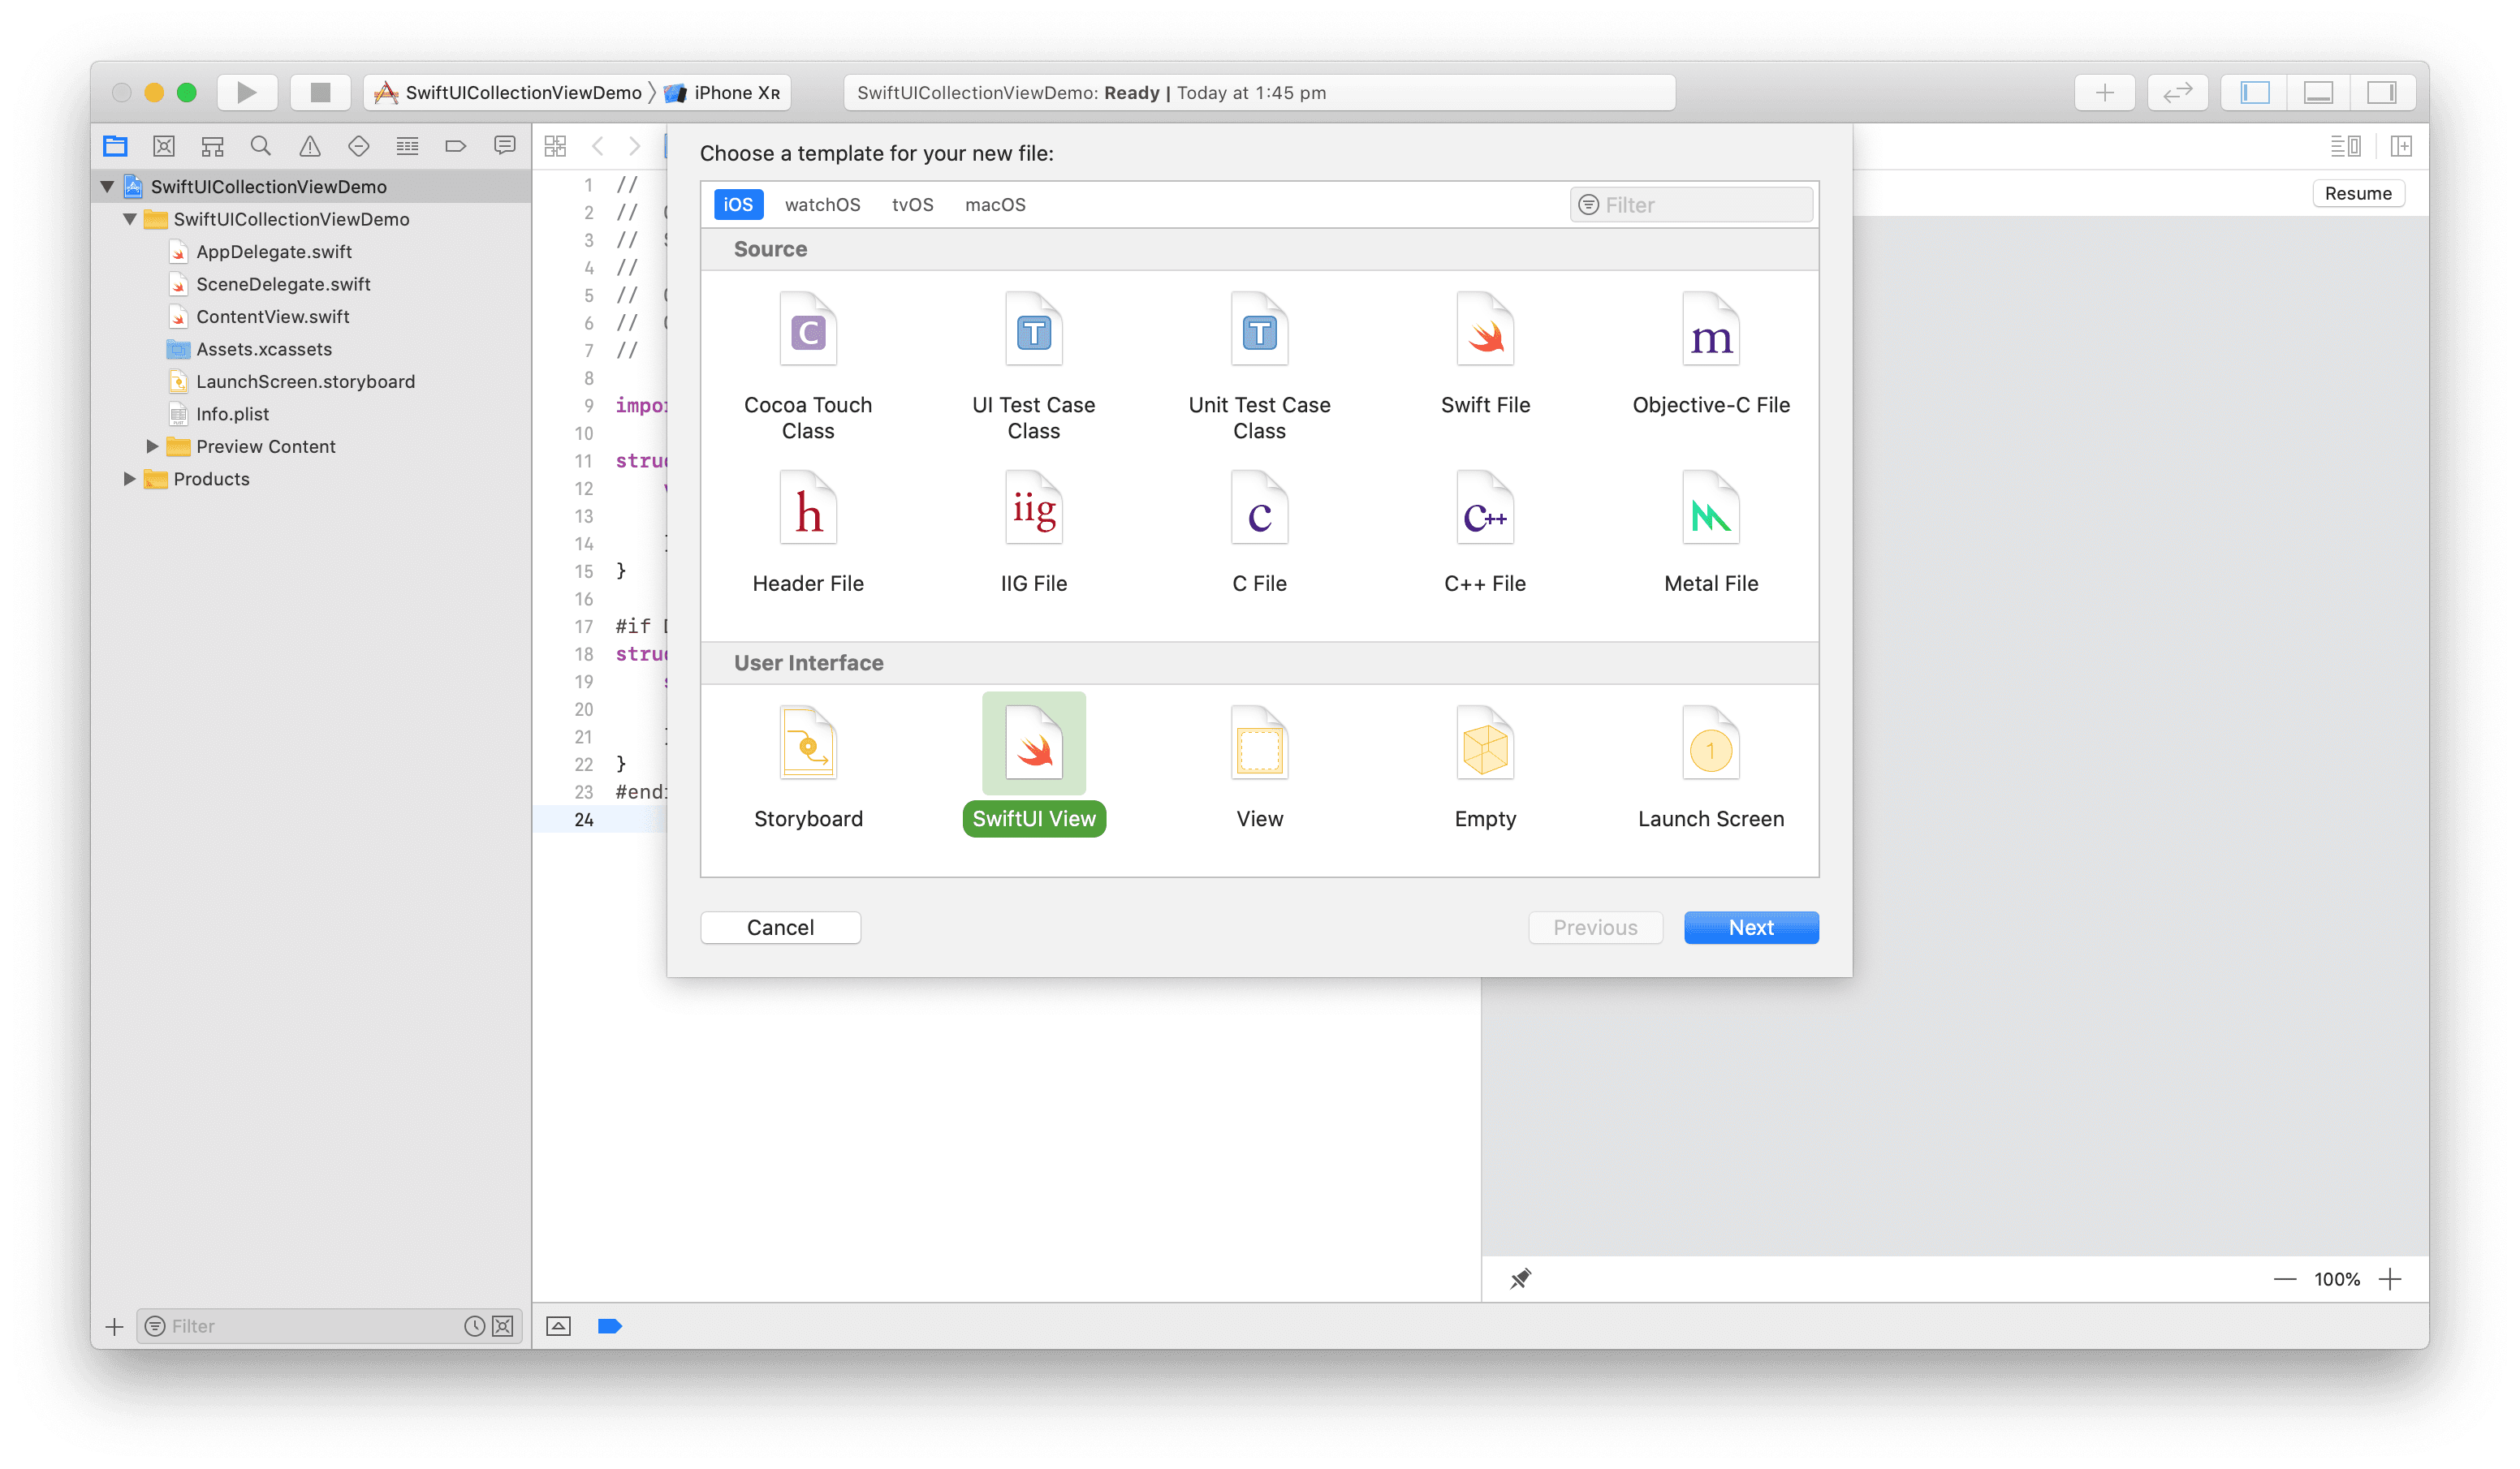
Start by creating a SwiftUI file called “MyCollectionView”.
struct MyCollectionView : View {
    var body : View {
        Text("Hello World!")
    }
}
We’re going to replace the protocol that MyCollectionView conforms to with UIViewRepresentable. This protocol requires us to implement the functions makeUIView and updateUIView, so let’s do that. You can start typing their names and Xcode autocomplete will take care of the rest. You’ll want to adjust the return of the makeUIView function to be a UICollectionView, as well as the first parameter of updateUIView. Finally, fill in the body of makeUIView to return a UICollectionView.
Fun fact: auto-completing the makeUIView and updateUIView functions of the UIViewRepresentable protocol for our UICollectionView will generate a parameter with the type UIViewRepresentableContext. This type can be replaced with Context for readability!
Once you’ve done all that, you should end up with something like the code below.
struct MyCollectionView : UIViewRepresentable {
    func makeUIView(context: Context) -> UICollectionView {
        return UICollectionView()
    }

    func updateUIView(_ uiView: UICollectionView, context: Context) {
        // We'll leave this empty for now
    }
}
Great! Now we’ll start implementing the proper creation of the collection in makeUIView. You can do whatever customization you would like to your layout, but I will be using a basic UICollectionViewFlowLayout. I’m also colouring the cells red, to ensure we can see them when they show up. We’ll also want to create our UICollectionViewDiffableDataSource (for more info on how this all works, check out the session Advances in UI Data Sources). My section and model objects look like this:
// This represents the different sections in our UICollectionView. When using UICollectionViewDiffableDataSource, the model must be Hashable (which enums already are)
enum MySection {
    case main
}

// This represents a model object that we would have in our collection. When using UICollectionViewDiffableDataSource, the model must be Hashable
class MyModelObject: Hashable {
    let id = UUID()

    func hash(into hasher: inout Hasher) {
        hasher.combine(id)
    }

    static func == (lhs: MyModelObject, rhs: MyModelObject) -> Bool {
        return lhs.id == rhs.id
    }
}
Here’s what it looks like after creating our UICollectionViewDiffableDataSource (if you haven’t already, resume automatic previews on the right). Don’t forget to click the play button next to the preview, as UIKit classes don’t get automatically rendered in the preview!
struct MyCollectionView : UIViewRepresentable {
    func makeUIView(context: Context) -> UICollectionView {
        let collectionView = UICollectionView(frame: .zero,
                                              collectionViewLayout: UICollectionViewFlowLayout())
        collectionView.register(UICollectionViewCell.self, forCellWithReuseIdentifier: "myCell")
        let dataSource = UICollectionViewDiffableDataSource(collectionView: collectionView) { collectionView, indexPath, myModelObject in
            let cell = collectionView.dequeueReusableCell(withReuseIdentifier: "myCell", for: indexPath)
            cell.backgroundColor = .red
            // ...
            // Do whatever customization you want with your cell here!
            // ...
            return cell
        }
        populate(dataSource: dataSource)
        return collectionView
    }

    func updateUIView(_ uiView: UICollectionView, context: Context) {
        // We'll leave this empty for now!
    }

    func populate(dataSource: UICollectionViewDiffableDataSource) {
        var snapshot = NSDiffableDataSourceSnapshot()
        snapshot.appendSections([.main])
        snapshot.appendItems([MyModelObject(), MyModelObject(), MyModelObject()])
        dataSource.apply(snapshot)
    }
}
Here’s a quick reference image so you can see the preview as well:
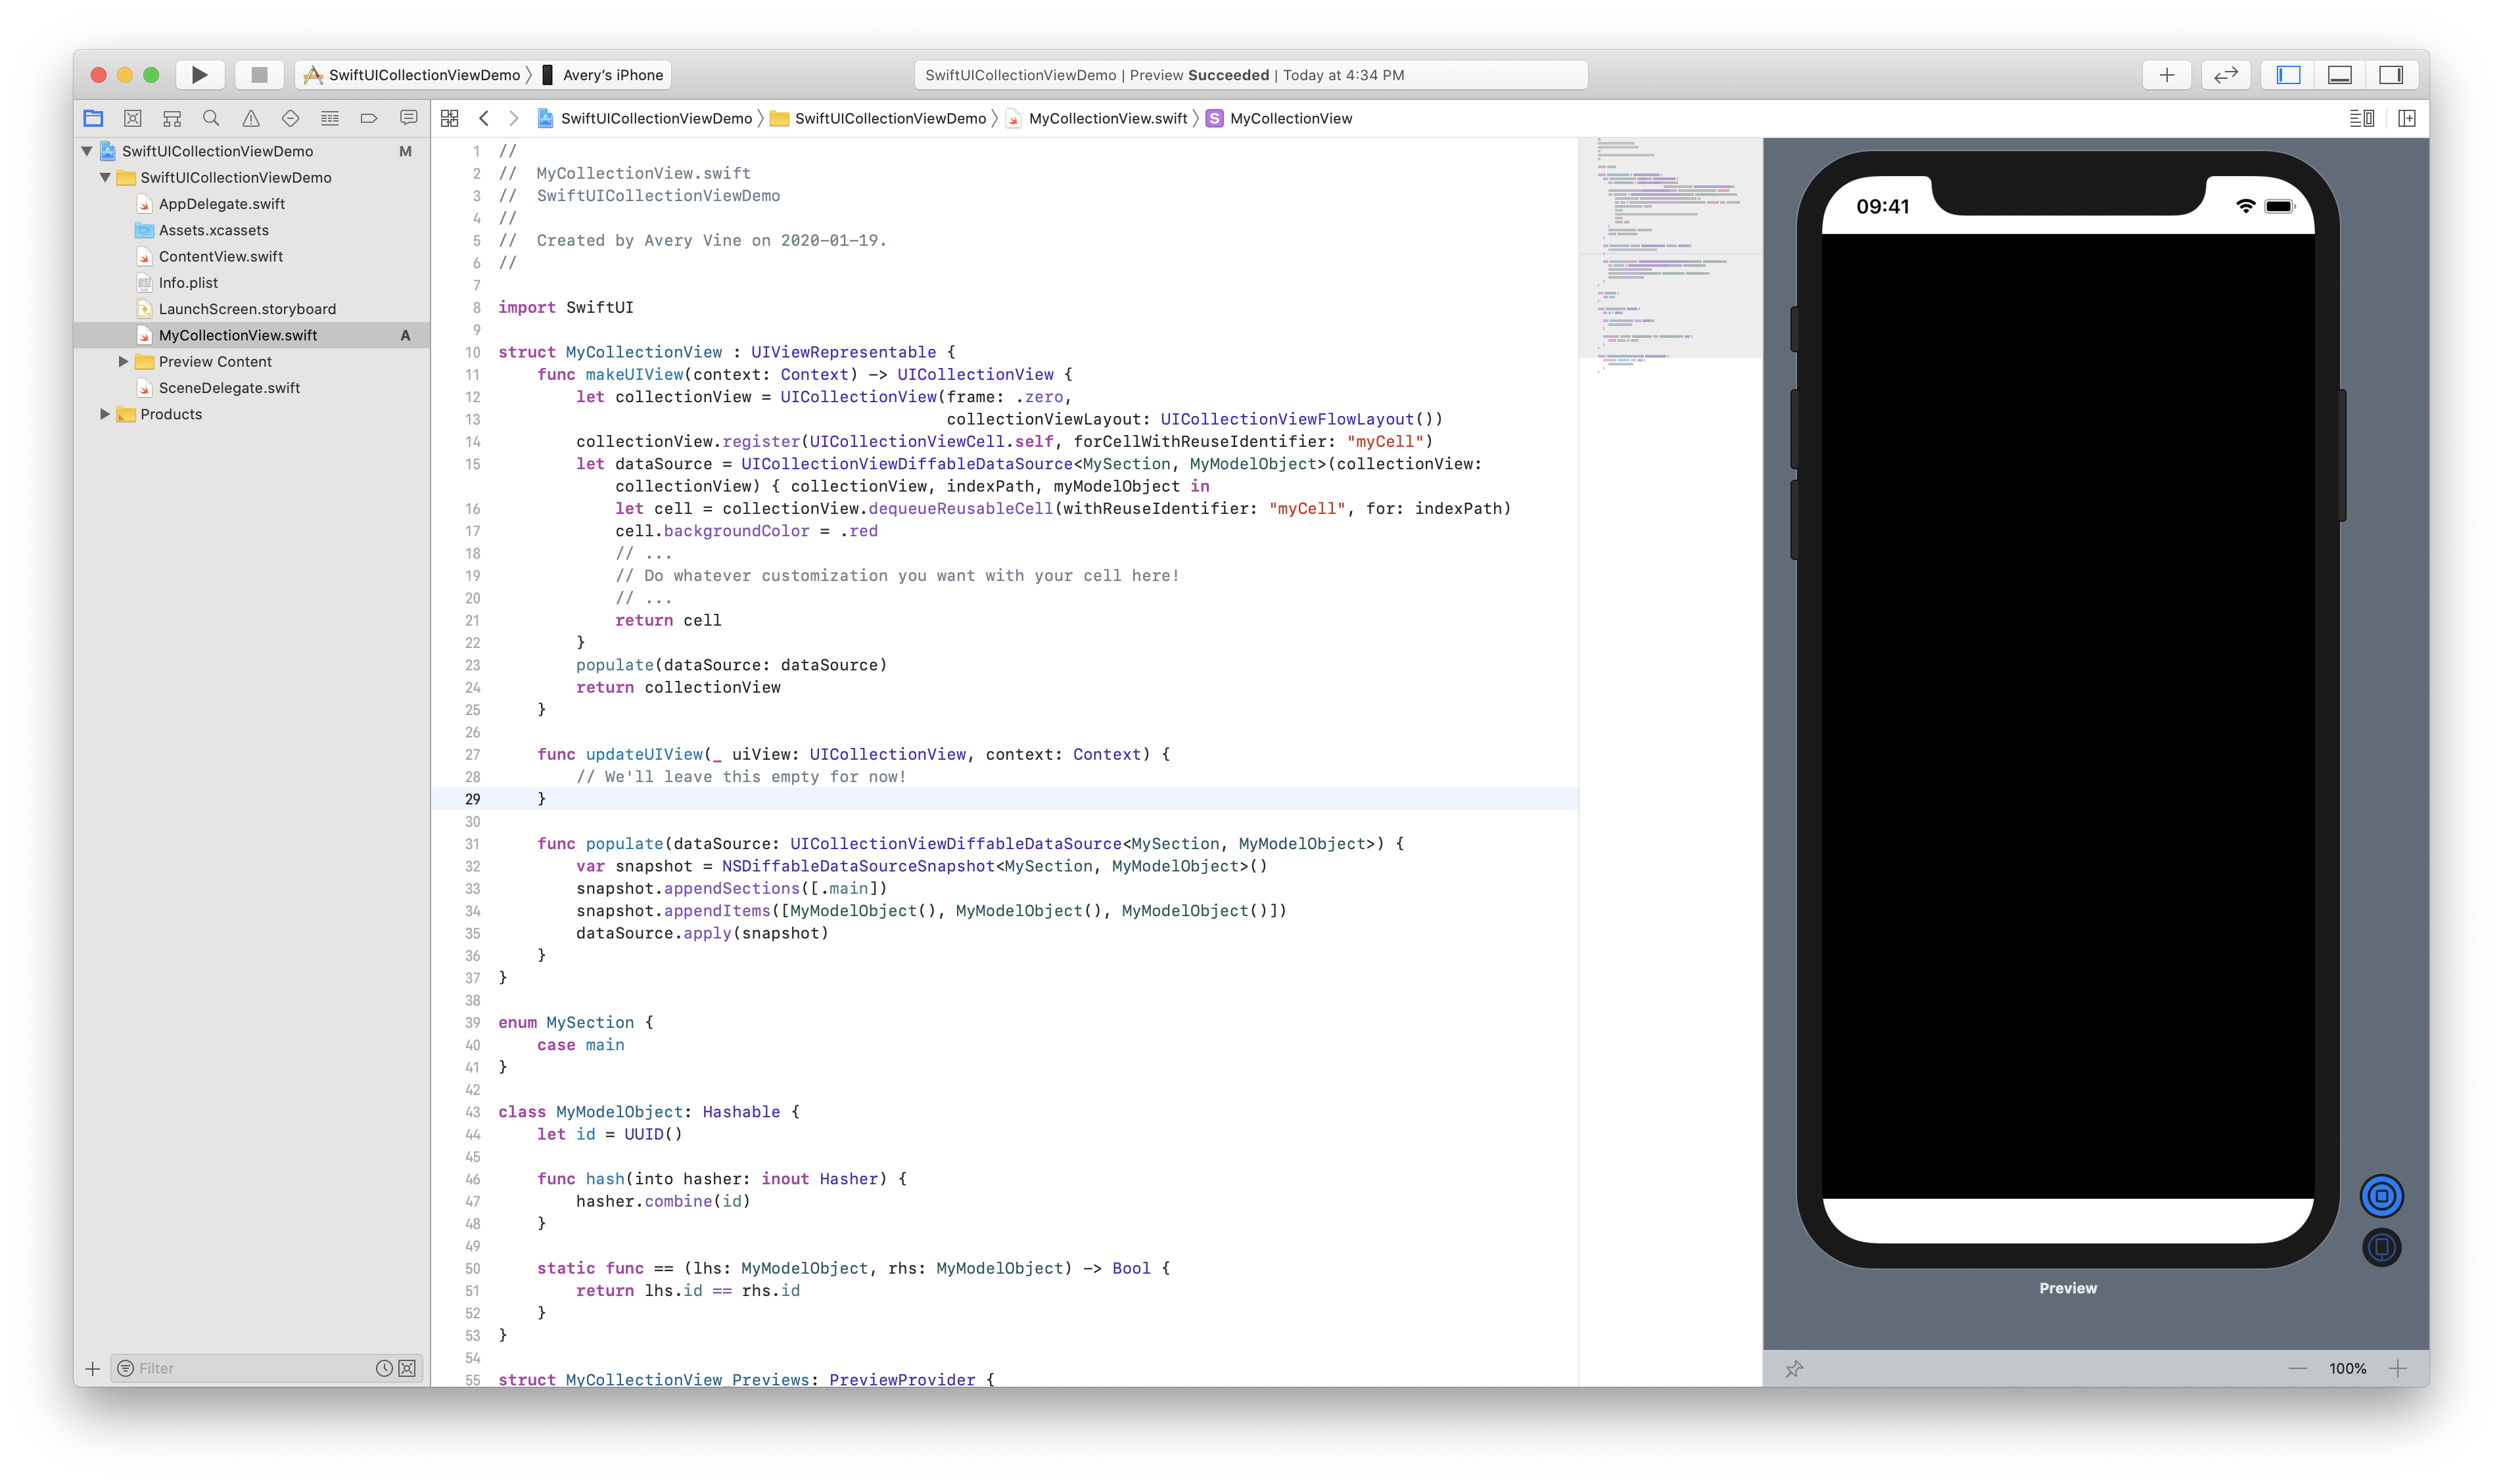
Great! …except not quite. You might have noticed that the preview on the right is entirely black with no cells! What’s happening?
This is because we are creating our UICollectionViewDiffableDataSource and storing it in the dataSource property, but it is entirely local to the makeUIView function scope! As soon as we leave that function, the data source for our collection is gone, and the cells in the collection can’t be rendered. We need to store the data source somewhere, and we can’t store it outside of makeUIView - that would cause the function to be mutable, and our collection would no longer conform to UIViewRepresentable. That’s where UIViewRepresentable’s coordinator comes in.
Coordinator in UIViewRepresentable
Both of the functions required by UIViewRepresentable get a Context (or a UIViewRepresentableContext, if you didn’t follow my note from earlier) object passed into them. This object can be used to implement delegates or store variables related to our collection! It gets passed around, allowing us to keep a reference to the data source and use it later on.
Firstly, create a class called “MyCoordinator”, and give it a dataSource property of type UICollectionViewDiffableDataSource. We’ll be assigning our data source to this property in our makeUIView function. But first, we need to actually instantiate our coordinator!
To do this, we’ll implement another one of UIViewRepresentable’s functions, makeCoordinator, and have it return our new coordinator object.
func makeCoordinator() -> MyCoordinator {
    MyCoordinator()
}
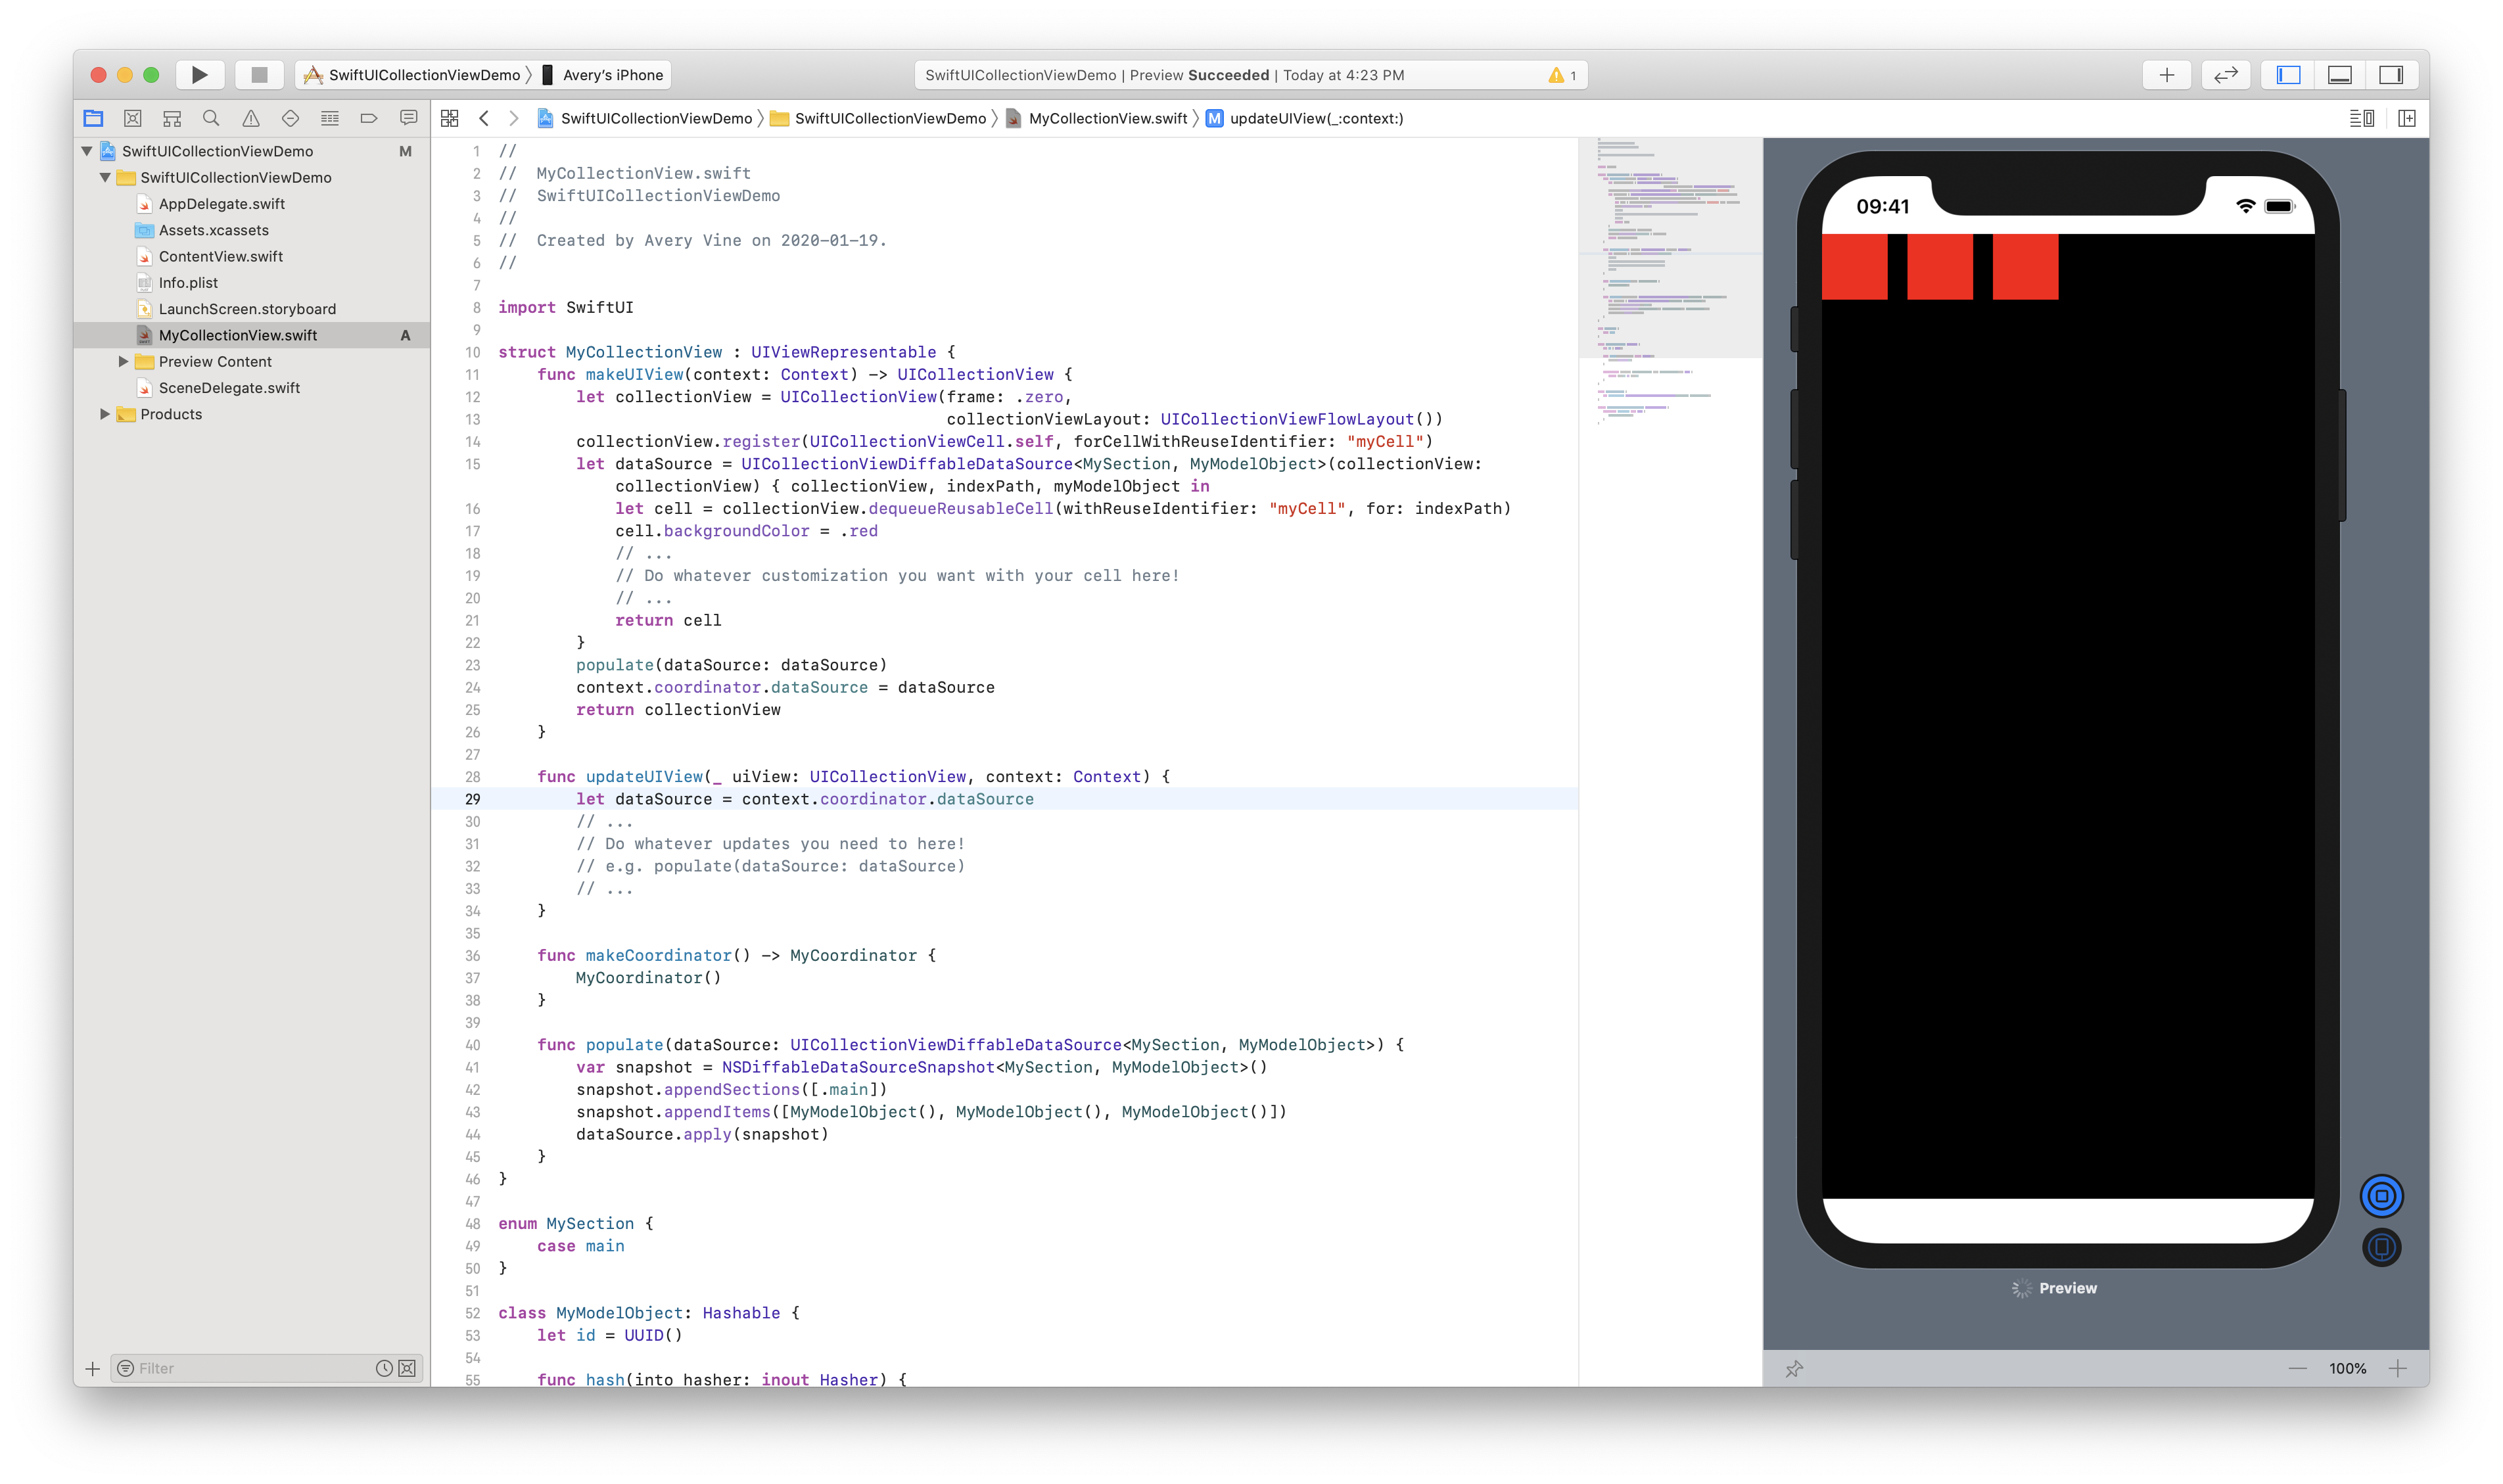
Now we can access the coordinator through the Context object in makeUIView! Before returning the UICollectionView at the bottom, save our data source in the coordinator.
    ...
    populate(dataSource: dataSource)
    context.coordinator.dataSource = dataSource // <-- add this!
    return collectionView
}
Awesome! Now we can access our coordinator in the updateUIView function as well.
func updateUIView(_ uiView: UICollectionView, context: Context) {
    let dataSource = context.coordinator.dataSource
    // ...
    // Do whatever updates you need to here!
    // e.g. populate(dataSource: dataSource)
    // ...
}
Resume the preview on the right side, and you should see red cells!
Wrap Up
SwiftUI has an incredible amount of potential, and while it doesn’t yet intrinsically support UICollectionView and the new UICollectionViewDiffableDataSource, we can quite easily create a wrapper around our collection to take advantage of this awesome new API.
If you’ve made it this far, and want to download a version of the code, you can grab it here.
What do you think of SwiftUI? Leave your comments below!